
You have a product idea, but you have no idea how plastic parts are actually made
You have seen plastic products your entire life. Toys, food containers, buckets, electrical boxes, and disposable cups are all made from plastic. But when you start a business that needs plastic parts made, you quickly discover that between your product idea and the finished part, there is a process most people have never needed to understand before.
What is a Plastic Injection Mould? How does a machine turn plastic pellets into a finished bucket or toy car? What does it actually mean to get a custom plastic mould made? And why does the mould matter so much to the quality of your final product?
At Hitbhav Mould, a leading Plastic Injection Mould Manufacturer, we work with first-time buyers every single week. This guide was written for you. We will walk through the entire plastic injection moulding process from start to finish, in plain language, so you know exactly what you are ordering and why every decision matters.
What is plastic injection moulding in the simplest possible terms?
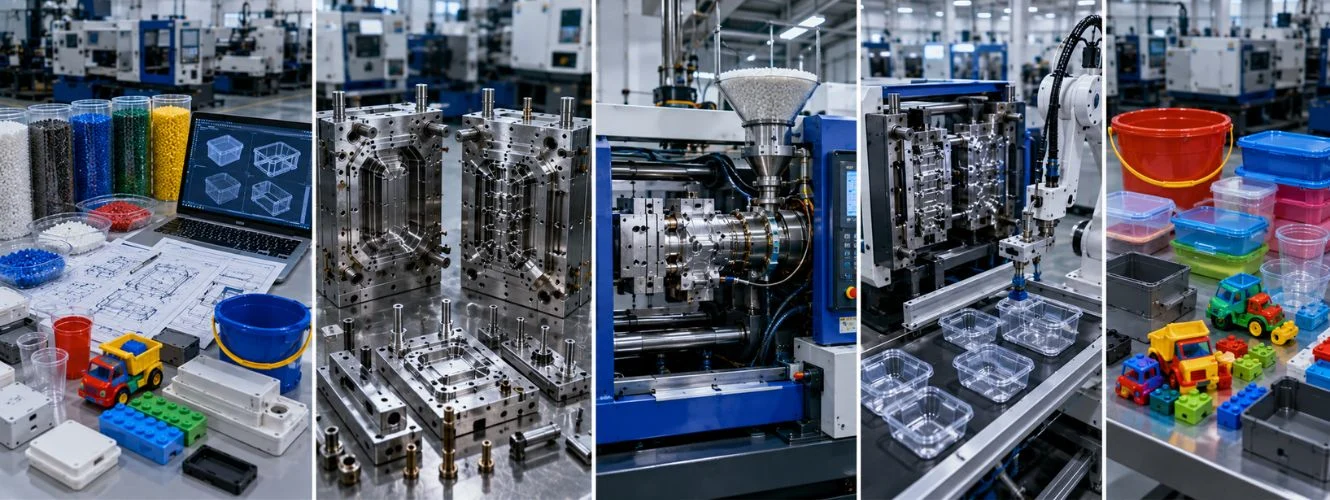
Plastic injection moulding is a manufacturing process that produces plastic parts by injecting molten plastic into a precision-shaped steel mould, allowing it to cool, and then ejecting the solid finished part. It is the most widely used plastic manufacturing method in the world, and with good reason.
Think of it like a waffle iron. You pour in batter (molten plastic), close the iron (close the mould), wait a few seconds for it to set (cooling), and open it up to release the finished shape (ejection). Except instead of a waffle, you get a food container, a toy car wheel, a plastic bucket handle, or an electrical switch box with perfect consistency, every single cycle.
The Plastic Injection Moulding Machine does the heating, pressurising, and cycling automatically. The plastic injection moulds the precision steel tool, which determines the shape, size, surface finish, and quality of every part that comes out of it. This is why choosing the right plastic mould manufacturer matters so much. The mould is permanent. Every part it ever produces reflects the quality of how it was built.
The plastic injection moulding process – step by step
Here is exactly what happens during every injection moulding cycle from the moment plastic resin enters the machine to the moment your finished part lands in the parts bin.
Clamping – The mould closes under pressure
The two halves of the mould (the cavity side and the core side) are brought together and held closed by the injection moulding machine’s clamping unit under enormous force measured in tonnes. For small toy parts, 80–200 tonnes of clamping force may be used. For large industrial moulds like Plastic Crate Moulds, 400–800 tonnes may be required
Injection – Molten plastic is forced into the mould
Plastic resin pellets (PP, ABS, HDPE, or other materials) are fed into the injection moulding machine’s heated barrel. The screw mechanism inside the barrel melts the plastic between 180°C and 280°C, depending on the material.
Dwelling – Pressure held to compensate for shrinkage
After the cavity fills, the machine holds injection pressure for a brief period, the dwell phase. This compensates for the natural shrinkage of plastic as it begins to cool and solidify, ensuring the part fills out completely without sink marks or voids.
Cooling – The part solidifies inside the mould
Cooling water flows through the channels drilled into the mould steel, rapidly drawing heat away from the molten plastic. The part solidifies into the exact shape of the cavity.
Mould opening – The two mould halves separate
Once the part has cooled sufficiently, the clamping unit releases and the mould opens the core side, separating from the cavity side. The solidified part stays on the core half, held in place until the ejection system fires.
Ejection – The finished part is pushed out
Ejector pins push forward, releasing the part from the mould core. The part falls or is removed by a robot arm. The mould then closes again, and the entire cycle repeats, producing one complete part (or multiple parts in a multi-cavity mould) every few seconds to a few minutes, depending on part size and wall thickness. For a Plastic Bucket Mould, a typical cycle is 25–45 seconds
Choosing the right plastic resin for your product
The plastic material you choose, called a resin, directly affects the look, strength, flexibility, temperature resistance, and cost of your finished part. It also determines how the mould cavity must be designed. Here are the most commonly used resins across Hitbhav Mould’s product categories:
PP – Polypropylene
Food-safe, heat-resistant, lightweight. Used for lunch box moulds, bucket moulds, food containers, and baby toys
ABS – Acrylonitrile Butadiene Styrene
Impact-resistant, takes colour vibrantly, excellent gloss. Used for toy car moulds, building blocks, and consumer product housings
HDPE – High-Density PE
Rigid, tough, chemical-resistant. Used for storage container moulds, dairy packaging, and industrial containers
PET – Polyethylene Terephthalate
Transparent, food-safe, strong. Used for clear food container moulds and salad packaging, where visible contents drive purchase
Nylon (PA)
High strength, wear-resistant, heat-stable. Used for industrial plastic moulds gears, toolbox components, and structural parts
PS – Polystyrene
Lightweight, cheap, easy to mould. Used for ice cream cup moulds, disposable cutlery, and cold-use food packaging
What is a T1 sample trial – and why you must never skip it
Once a new plastic mould is built, it runs its first production cycle called a T1 trial or first article trial. This is not a production run. It is a controlled test that produces the first real parts from the actual mould for dimensional measurement, visual inspection, and assembly fitment check.
At Hitbhav Mould, we run every new mould on our in-house Plastic Injection Moulding Machine before it leaves our facility. The T1 sample parts are measured against your approved drawing, checked for surface quality, and tested for any assembly fitment requirements. You receive these samples for your own review and sign-off.
Why first-time buyers trust Hitbhav Mould for their first plastic injection mould
100% in-house manufacturing
CNC machining, EDM finishing, heat treatment, and mirror polishing are all done at our Ahmedabad facility. No outsourcing, no quality gaps, full accountability
DFM review on every project
Every product drawing is reviewed for manufacturability before machining begins, catching design problems that would otherwise cost you time and money post-build
T1 sample approval – always
You approve real parts before your mould ships. Dimension, finish, and fitment are all verified before production begins, so there are no surprises on your factory floor
After-sales mould support
Mould repair, cavity polishing, ejector pin replacement, and refurbishment, we support every mould we build throughout its full working life
Conclusion – now you know how plastic injection moulding works
Plastic injection moulding is one of the most powerful and precise manufacturing processes ever developed. A single mould, built correctly, can produce hundreds of thousands of perfect plastic parts consistently, economically, and at the speed your business needs to grow.
At Hitbhav Mould, a trusted Plastic Die Maker, we are ready to guide you from your first question to your first production run.
Ready to order your first plastic injection mould? Let us guide you through every step.
Share your product idea, drawing, or reference sample. Our engineering team will recommend the right mould type, resin, steel grade, and cavity layout completely free, with no pressure to proceed until you are confident and ready.