
Introduction
Plastic food containers are used every day for food storage, takeaway packaging, meal preparation, and many other applications. To produce these containers with accurate dimensions, smooth finishing, and consistent quality, manufacturers use specially designed Plastic Food Container Moulds.
A high-quality Plastic Food Container Mould is the foundation of consistent and efficient container production. The mould determines the final shape, dimensions, surface finish, wall thickness, and many other important features of the container.
As a Plastic Food Container Mould Manufacturer from Ahmedabad, India, we build this process every day, so we are sharing exactly how it works, step by step.
What Is a Plastic Food Container Mould?
A plastic food container mould is a metal tool, usually made from hardened steel, that gives shape to melted plastic when it is injected under pressure inside an injection moulding machine. Once the plastic cools and hardens inside the mould, it takes the exact shape of the cavity, forming a finished container ready for use.
These moulds are built to run continuously for months or years, so they need to handle high pressure, repeated heating and cooling, and constant contact with food-grade plastic materials without losing accuracy.
Materials Used to Make Food Container Moulds
The mould itself is made from tool steel, while the container is made from food-safe plastic. Here is how the two work together:
✓ Mould steel: Grades like P20 and H13 are commonly used for the core and cavity because they resist wear and hold a fine polish over long production runs.
✓ Mould base: Usually built on a C45 steel base or a standard base for stability during high-speed operation.
✓ Plastic material for containers: Polypropylene (PP) is the most common choice for food containers because it is food-safe, microwave-friendly, and cost-effective. PET and HDPE are also used depending on the container’s purpose, such as clear packaging or freezer-safe storage.
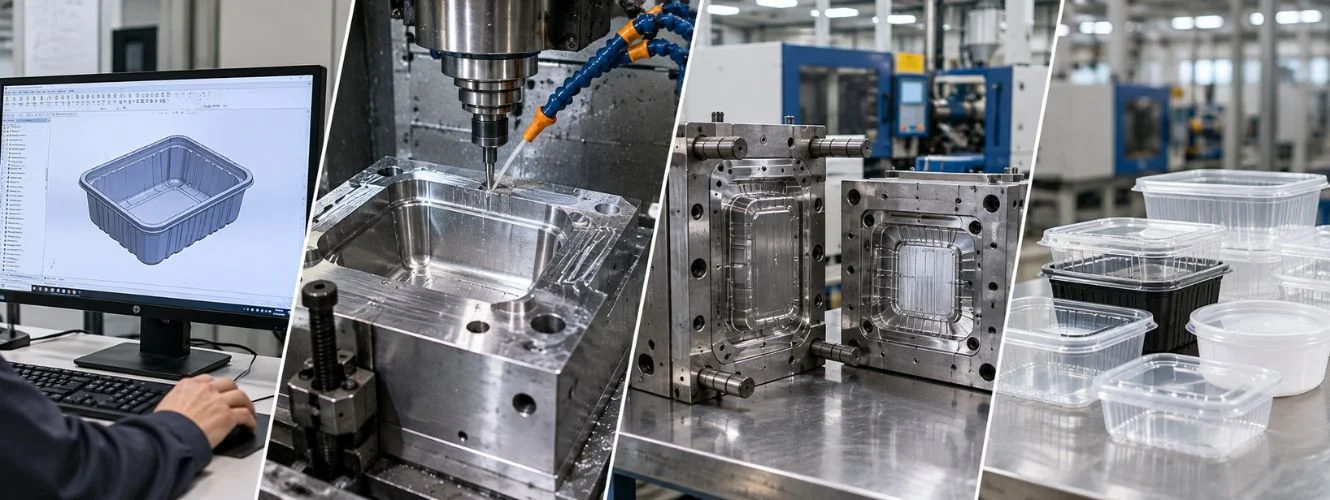
Step-by-Step: How a Plastic Food Container Mould Is Made
Step 1: Understanding the Container Design
The process starts with the client’s requirement, whether it is a round tiffin box, a rectangular meal tray, or a container with a snap-fit lid. The manufacturer studies the container’s capacity, wall thickness, and stacking needs before design work begins.
Step 2: 3D Mould Design and Moldflow Simulation
Engineers create a 3D model of the mould using CAD software. This design is then run through Moldflow simulation to check how the melted plastic will flow inside the cavity, where it might cool unevenly, and where warping could occur. Catching these issues on screen saves weeks of rework later, since correcting a design after the steel is cut is far more expensive.
Step 3: Selecting the Number of Cavities
Food container moulds can have anywhere from a single cavity to six or more cavities, depending on production volume needed. A single-cavity mould produces one container per cycle, while a multi-cavity mould produces several at once, which is common for high-demand disposable packaging.
Step 4: CNC and EDM Machining
Once the design is approved, the steel block is machined using CNC (Computer Numerical Control) and EDM (Electrical Discharge Machining) equipment. This stage carves out the exact core and cavity shapes with precision measured in microns, ensuring every container that comes out later is dimensionally identical.
Step 5: Building the Cooling System
Cooling channels are drilled through the mould block to circulate water during production. Proper cooling reduces cycle time and prevents the container from warping as it solidifies. This step matters more than most people realise, since uneven cooling is one of the biggest causes of rejected containers.
Step 6: Gate and Runner System
The gate is the point where molten plastic enters the cavity. Depending on the container design, manufacturers choose a pin-point gate, sub gate, or side gate, paired with either a hot runner or cold runner system, to control how evenly the plastic fills the mould.
Step 7: Adding the Ejection System
Once the container has cooled and hardened, it needs to be released from the mould without damage. Ejector pins, stripper plates, or air valves are built into the mould to push the finished container out cleanly.
Step 8: Polishing and Surface Finishing
The inner cavity surface is polished, either to a mirror finish for glossy, transparent-looking containers or a dimpled finish for a matte, non-slip texture. This directly affects how the final product looks on a retail shelf.
Step 9: Trial Run and Quality Testing
Before the mould is approved for mass production, it goes through trial shots on an injection moulding machine. Manufacturers check wall thickness, weight consistency, and finish quality, and make small adjustments if needed.
Step 10: Mass Production
Once the trial is approved, the mould goes into full production, running thousands of cycles to produce containers consistently, cycle after cycle, for the life of the tool.
Typical Specifications of a Plastic Food Container Mould
To give you a realistic picture, here are the specifications we commonly work with for food container moulds:
➔ Container capacity: 100 ml to 2,000 ml
➔ Number of cavities: 1 to 6 (customisable based on volume needs)
➔ Suitable machine tonnage: 100 to 450 ton
➔ Cycle time: 10 to 30 seconds per shot
➔ Mould life: 500,000 to 1,000,000 shots
➔ Typical delivery time: 50 to 60 days from design approval
How Much Does a Plastic Food Container Mould Cost?
Cost depends heavily on cavity count, container complexity, and steel grade. Simple, single-cavity moulds for basic containers sit at the lower end, while multi-cavity moulds for complex shapes with hot runner systems cost more. As a general range, food container moulds typically fall between ₹80,000 and ₹9,00,000, though every quote should be based on your exact container design and production target.
Why Choose Hitbhav Mould for Your Food Container Mould
We are a Plastic Food Container Mould Manufacturer in Ahmedabad, Gujarat, building moulds for takeaway containers, storage boxes, and meal packaging using PP, PET, and HDPE. Every mould we build goes through 3D design validation, precision CNC and EDM machining, and a full trial run before it reaches your production floor. We also provide after-sales support, including mould setup assistance, re-polishing, and insert replacement, so your mould keeps performing well long after delivery.
Frequently Asked Questions
1. What is the lifespan of a plastic food container mould?
– A well-built food container mould, made with hardened steel like P20 or H13, can run for 500,000 to 1,000,000 shots with proper maintenance, making it a long-term investment rather than a recurring expense.
2. Which plastic material is best for food containers?
– Polypropylene (PP) is the most widely used material for food containers because it is food-safe, heat-resistant, and cost-effective. PET is preferred for clear, see-through packaging, while HDPE suits containers that need extra rigidity or freezer storage.
3. How long does it take to manufacture a plastic food container mould?
– Delivery typically takes 50 to 60 days from design approval, depending on the container’s complexity and the number of cavities required.
4. Can a food container mould be customised for my container design?
– Yes. Food container moulds can be customised in shape, size, number of compartments, and cavity count to match your exact packaging and production requirements.
5. What is the difference between a single-cavity and multi-cavity mould?
– A single-cavity mould produces one container per machine cycle, which suits lower-volume or highly customised products. A multi-cavity mould produces several containers at once, which is more cost-effective for high-volume disposable packaging.
Get a Custom Plastic Food Container Mould Quote
If you are planning to manufacture food containers and need a mould designed around your exact specifications, share your container size, material, and production volume with our team.
Call: +91 99258 10161
Email: info@hitbhavmould.com